🌍 Zero-Waste Living: Why Apartment Composting is Your Smartest Move
Composting on a small apartment balcony is the ultimate win for sustainability and your wallet. This quick, odorless composting method reduces your garbage (making your apartment trash cleaner and healthier), cuts fertilizer costs, and creates the best possible food for all your potted plants. This is a powerful step towards urban gardening and a zero-waste home.
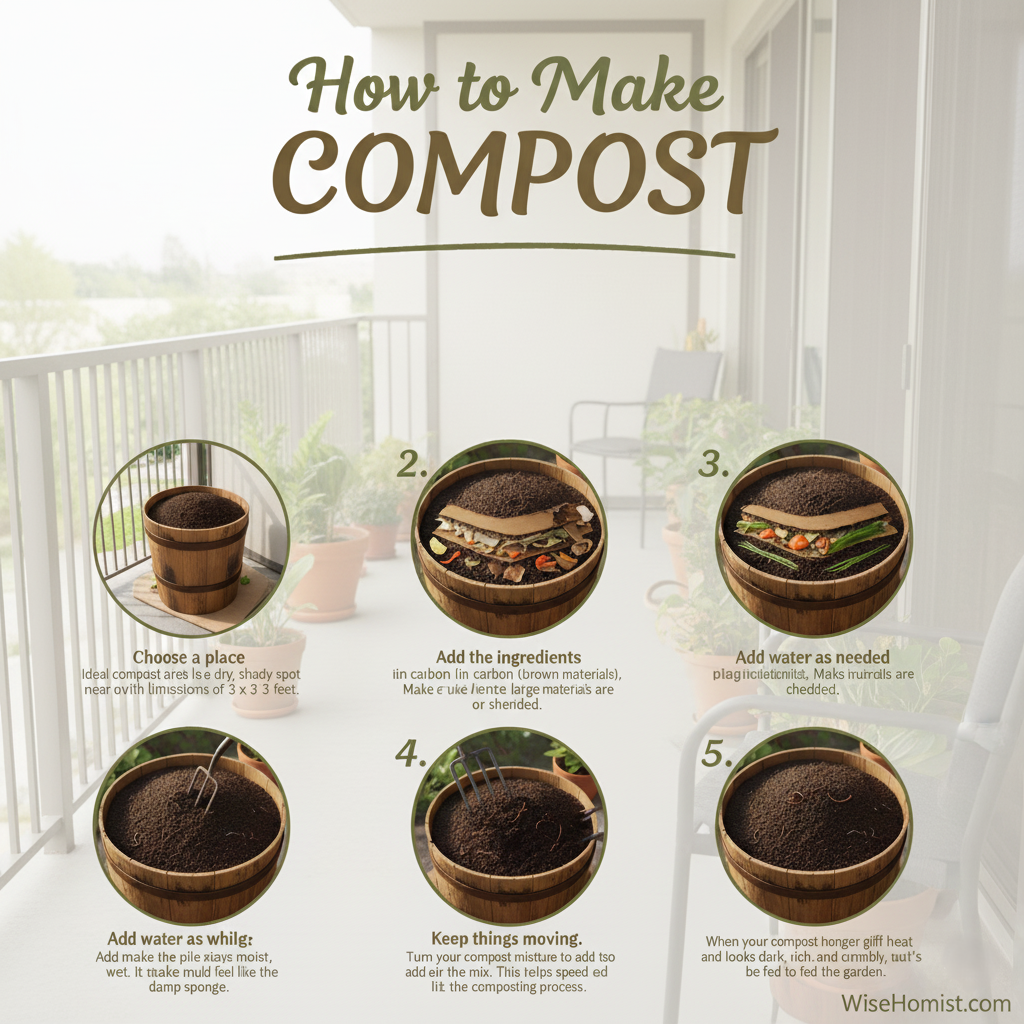
1. The Simple, Smell-Proof Setup
- The Container: Use any plastic storage bin with a secure lid. A tight lid keeps pests out, and a small bin is easy to manage on a balcony garden.
- Stop the Smell: Bad smells only happen when there is no air! Drill several small holes around the top sides and in the lid.
- Aerate Base: Place the bin on two small pieces of wood or bricks to lift it slightly, helping air circulate under the bottom holes.
2. The Quick Composting Formula
For fast, healthy compost, you must balance your wet Greens (Nitrogen) with your dry Browns (Carbon). This balance stops the contents from becoming a soggy, stinky mess.
| Your Material | Category | Role | Quick Prep |
|---|---|---|---|
| Coffee Grounds & Veg Scraps | Greens (Nitrogen) | Provides the “fuel” for microbes. | Chop all scraps small (less than 1 inch) so they break down in weeks, not months. |
| Shredded Cardboard | Browns (Carbon) | Absorbs all excess moisture and provides structure for air. | Shred finely (no glossy prints or tape). |
The Golden Rule: For every scoop of Greens (food scraps), add 2 to 3 scoops of Browns (shredded cardboard).

3. The Odor-Free, Quick Process
- Start: Place a few inches of shredded cardboard at the bottom. Add a handful of potting soil to jump-start the microbe activity.
- Add Scraps: Dump in your chopped Greens (food/coffee grounds).
- Bury Completely: Immediately cover the scraps with a thick, fluffy layer of shredded cardboard. This is your insurance against fruit flies and odors!
- Moisture Check: The mix should feel like a wrung-out sponge—damp but not dripping. If it seems dry, sprinkle with a little water; if it seems wet or starts to smell, add more shredded cardboard.
- Mix for Speed: To get compost fast (in weeks, not months), mix and stir the contents with a trowel every 2-3 days. This adds oxygen, which prevents the bad, sour smells.
4. Why DIY Compost Beats Store-Bought Fertilizer
Your homemade compost offers a balanced, slow-release diet of macro- and micronutrients ($\approx 1-1-1$ NPK) that is superior to the high-concentration, quick-fix chemicals found in synthetic fertilizers. It feeds the soil for long-term health, not just for an immediate, short-lived growth spurt.
#ApartmentComposting #DIYCompost #ZeroWasteHome #SustainableLiving #BalconyGarden #UrbanGardening #OdorlessComposting #KitchenScraps #EcoFriendly